Dieser Artikel benötigt eine redaktionelle Überprüfung. So können Sie helfen.
Vor dem Holen des Codes zum Bauen von Firefox OS benötigt man ein geeignet konfiguriertes Build-System. Im folgenden wird dieser Vorgang beschrieben. Zur Zeit eignen sich 64-bit-Linux-Distributionen und Mac OS X.
Anmerkung: Wenn man Firefox OS auf ein Telefon installieren will, beginnt man, ohne das Telefon an den Computer angeschlossen zu haben. Im Text wird dann später erklärt, wann man das Telefon anschließen muß.
Kompatibles Gerät oder Emulator besorgen
Das System kann nur für ein kompatibles Gerät (i.a. ein Smartphone) oder einen Emulator gebaut werden. Obwohl wir diverse Geräte unterstützen, gibt es für einige von diesen unterschiedliche Ausführungen. Von diesen Ausführungen unterstützen wir zur Zeit nur bestimmte, und außerdem werden einige Geräte besser unterstützt als andere.
Anmerkung: Mozillas B2G-Quellcode ist die Referenzimplementation von B2G, aber Telefonherstellern ist es freigestellt, Fehlerkorrekturen ("Patches") hinzuzufügen oder andere Änderungen vorzunehmen. Wenn man zum Beispiel ein Alcatel One Touch kauft, läuft darauf eine herstellerspezifische Version. Das ist für die installierten Apps irrelevant, aber unter Umständen kann es auf Plattform-Ebene Unterschiede geben. Die Version für das Nexus-4 ("Nexus 4 Port") wird direkt von Mozilla gepflegt, also ist es viel wahrscheinlicher, dass dieses Telefon mit unserer Gecko-Version auf Anhieb funktioniert, als zum Beispiel bei Rang-3-Geräten.
Rang 1 (Tier 1)
Tier-1-Geräte werden bei der Entwicklung bevorzugt und sind typischerweise die ersten, die Fehlerkorrekturen ("bugfixes") und Erweiterungen ("feature updates") erhalten.
- Keon
- Keon ist ein Gerät der FIrma Geeksphone und eines der ersten Entwicklertelefone. Beachte, dass Binärpakete ("builds") für diese Geräte von Geeksphone bereitgestellt werden.
- Inari
- Inari ist ein weiteres Testgerät. Benutze diese Konfiguration, um FirefoxOS für die ZTE-Open-Geräte zu bauen. Warnung: Neuere Firefox-OS-Builds könnten auf ZTE Open Probleme beim Booten von der Standard-Boot-Partition machen.
- Flame
- Flame is Mozillas neues Standard-Referenztelefon für Firefox OS. Die Konfiguration für Flame sollte auch verwendet werden, wenn man für das Gerät ZTE Open C baut, weil beide Geräte auf der Android-Jellybean-Basis aufbauen.
- Emulatoren (ARM und x86)
- Zur Zeit gibt es zwei Emulatoren, einen für die Emulation eines ARM-Prozessors und einen für die Emulation eines x86-Prozessors. Hier erfährt man mehr über die Installation und die Verwendung der Emulatoren.
- Achtung: Der x86-Emulator ist derzeit nicht praxistauglich, sowohl was die Installation angeht als auch die Unterstützung.
- Desktop
- Man kann auch eine Version von Firefox OS für Desktop-Rechner bauen; diese führt Gecko in einer XULRunner-Anwendung aus und darin Benutzerumgebung Gaia.
- Flatfish
- Flatfish ist das erste für Firefox OS entwickelte Tablet, auf dem jedoch einige Telefoniefunktionen fehlen. Es werden ein paar spezielle Einstellungen benötigt, um den Code zu bauen.
Natürlich kann man den Desktop-Client und die Emulatoren auch bauen, ohne ein Telefon zu benutzen.
Rang 2 (Tier 2)
Bei den Tier-2-Geräten ist die Grundfunktionalität gegeben, und viele Entwickler, insbesondere App-Entwickler, arbeiten damit, daher sind es üblicherweise die nächsten Geräte (nach Tier-1), für die Änderungen bereitgestellt werden.
- Samsung Nexus S
- Die einzigen Varianten dieses Smartphones, von denen bekannt ist, daß sie mit Firefox OS funktionieren, sind GT-I9020A (mit Amoled-Bildschirm) and GT-I9023 (Billigmodell mit LCD). Möglicherweise funktionieren aber auch weitere.
- Samsung Nexus S 4G
- The SPH-D720 is supported as a tier 2 device.
Rang 3 (Tier 3)
Man kann Firefox OS für diese Geräte bauen, aber die Hauptentwickler verwenden sie nicht regelmäßig. Bezüglich Stabilität, Zuverlässigkeit und Funktionsvielfalt stehen sie daher den Tier-1- und Tier-2- Geräten möglicherweise nach.
- Samsung Galaxy S2
- Nur die Variante i9100 funktioniert, keine andere, zumindest nicht offiziell (i9100P könnte auch funktionieren, da sie sie sich nur durch einen zusätzlichen NFC-Baustein unterscheidet.)
- Samsung Galaxy Nexus
- Zur Zeit ist keine Variante bekannt, die nicht funktioniert.
- Nexus 4
- Einige Anwender haben laut IRC dieses Gerät mit Erfolg getestet. Möglicherweise muß man für den Fall, daß man Android 4.4 installiert hat, vorher auf 4.3 zurückgehen (Android- Betriebssystem-Images sind bei Google erhältlich)
- Nexus 5
- Einige Anwender haben laut IRC dieses Gerät mit Erfolg getestet.
- Tara
- Tara ist ebenfalls ein Testgerät. Das "Manifest" für Tara existiert nur im "master branch". Um den Tara-Code zu erhalten, ruft man folgendes Script auf: "BRANCH=master ./config.sh tara".
- Unagi
- Unagi ist ein Telefon, das als Test- und Entwicklungsplattform für einfache bis Mittelklasse- Smartphones verwendet wird. Viele Core-Firefox-OS-Entwickler arbeiten auf Unagi.
- Pandaboard
- Das Pandaboard ist eine Entwicklungsplatine ("Board"), die auf der OMAP-4-Architektur basiert, und wird verwendet, um auf mobilen Plattformen zu entwickeln.
Bemerkung: Tier-2 und Tier-3-Geräte haben einen virtuellen, d.h durch Software dargestellten, Home-Button anstelle eines physikalischen.
Alle Tier-1-Geräte haben dagegen einen physikalischen "Home"-Button, mit dem man bei Betätigen stets auf den Startbildschirm zurückkehrt. Die meisten Android-Geräte für Version 4 oder später haben einen auf dem Bildschirm dargestellten "Home"-Button. Auch Firefox OS kann solch eine Schaltfläche darstellen; sie wird automatisch bei entsprechenden Geräten aktiviert. Wenn dies versagen sollte, muß man die Einstellungen öffnen und zu den Geräteinformationen navigieren, dort dann "Weitere Informationen" öffnen und "Entwicklermenü" einschalten (falls noch nicht geschehen). Dann wieder zurück zu den Einstellungen navigieren und das Entwickler-Menü öffnen, dort "Software-Startschaltfläche" einschalten.
Anforderungen für Linux
Um auf Linux bauen zu können, benötigt man:
- eine installierte 64bit GNU/Linux-Distribution (wir empfehlen Ubuntu 12.04).
- mindestens 4 GB RAM/swap
- mindestens 20 GB verfügbaren Massenspeicher
Das ist zwar etwas mehr, als tatsächlich benötigt wird, aber mitunter kommt es vor, daß der Erstellungsprozeß gerade deswegen fehlschlägt, weil ein wenig Speicher fehlt.
Außerdem werden folgende Dienstprogramme benötigt und müssen ggf. nachinstalliert werden:
- autoconf 2.13
- bison
- bzip2
- ccache
- curl
- flex
- gawk
- git
- gcc / g++ / g++-multilib
- make
- OpenGL shared libraries
- patch
- X11 headers
- 32-bit ncurses
- 32-bit zlib
Installation im Falle eines 64-Bit-Linux
Im folgenden werden die Kommandos aufgeführt, mit denen man die notwendigen Programmpakete für das Bauen von Firefox OS installieren kann.
Ubuntu 12.04 / Linux Mint 13 / Debian 6
Diese Kommandos in einem Terminal-Fenster ausführen:
sudo apt-get update
sudo apt-get install autoconf2.13 bison bzip2 ccache curl flex gawk gcc g++ g++-multilib git ia32-libs lib32ncurses5-dev lib32z1-dev libgl1-mesa-dev libx11-dev make zip
Für den Fall, daß Firefox OS für das Referenzgerät "Flame" oder Nexus 5 gebaut wird, diese Kommandos auführen:
sudo apt-get install libxml2-utils
Ein Java-Entwicklungspaket ("JDK") kann von dieser Paketquelle (ppa) installiert werden.
Bitte auch die obigen Anmerkungen berücksichtigen, die die Probleme beschreiben, die auftreten, wenn man für einen Emulator baut!
Ubuntu 12.10 / Debian 7
Das folgende Kommando im Terminal-Fenster ausführen:
$ sudo apt-get install autoconf2.13 bison bzip2 ccache curl flex gawk gcc g++ g++-multilib gcc-4.6 g++-4.6 g++-4.6-multilib git ia32-libs lib32ncurses5-dev lib32z1-dev libgl1-mesa-dev libx11-dev make zip
Zusätzlich zu den oben erwähnte Schwierigkeiten beim Bauen für einen Emlator tritt hier noch das Problem auf, daß standardmäßig der Compiler in der Version gcc-4.7 verwendet wird, welcher den Compiliervorgang mit folgender Fehlermeldung abbricht:
"KeyedVector.h:193:31: error: indexOfKey was not declared in this scope, and no declarations were found by argument-dependent lookup at the point of instantiation"
Um diesen Fehler zu beheben, muß man auf die ältere Version gcc-4.6 als Standard-Compiler zurückgehen, und zwar am besten unmittelbar, nachdem man die Quellen für B2G heruntergeladen hat. Der Vorgang wird in der Anleitung "Changing the default host compiler" (engl.) beschrieben.
Bei einer unveränderten Ubuntu-12.10-Version gibt es eine Fehlermeldung wegen nicht erfüllter Abhängigkeiten der Systembibliotheken "ia32-libs". Dies wird mit diesen Befehlen behoben:
sudo dpkg --add-architecture i386
sudo apt-get update
sudo apt-get install ia32-libs
Ubuntu 13.04
Die folgenden Kommandos sind im Terminal-Fenster auszuführen:
$ sudo apt-get install --no-install-recommends autoconf2.13 bison bzip2 ccache curl flex gawk gcc g++ g++-multilib gcc-4.6 g++-4.6 g++-4.6-multilib git ia32-libs lib32ncurses5-dev lib32z1-dev zlib1g:amd64 zlib1g-dev:amd64 zlib1g:i386 zlib1g-dev:i386 libgl1-mesa-dev libx11-dev make zip
Auch hier muß von gcc-4.7 auf gcc-4.6 zurückgegangen werden, wie oben für Ubuntu 12.10 beschrieben.
Ubuntu 13.10
With Ubuntu 13.10, multi-arch packages are now the main way to support multiple architectures (e.g. 32-bit on a 64-bit install). You must tell your Ubuntu system that you want to support 32-bit packages as well:
sudo dpkg --add-architecture i386
sudo apt-get update
Once you've completed that, then you can install the necessary packages:
sudo apt-get install --no-install-recommends autoconf2.13 bison bzip2 ccache curl flex gawk gcc g++ g++-multilib gcc-4.6 g++-4.6 g++-4.6-multilib git lib32ncurses5-dev lib32z1-dev zlib1g:amd64 zlib1g-dev:amd64 zlib1g:i386 zlib1g-dev:i386 libgl1-mesa-dev libx11-dev make zip libxml2-utils

sudo update-alternatives --install /usr/bin/gcc gcc /usr/bin/gcc-4.6 1

sudo update-alternatives --install /usr/bin/gcc gcc /usr/bin/gcc-4.8 2

sudo update-alternatives --install /usr/bin/g++ g++ /usr/bin/g++-4.6 1

sudo update-alternatives --install /usr/bin/g++ g++ /usr/bin/g++-4.8 2

sudo update-alternatives --set gcc "/usr/bin/gcc-4.6"

sudo update-alternatives --set g++ "/usr/bin/g++-4.6"
you can install the jdk via this ppa.
Ubuntu 14.04
Follow the instructions given for Ubuntu 13.10.
Fedora 19/20
Run the following command in Terminal:
sudo yum install autoconf213 bison bzip2 ccache curl flex gawk gcc-c++ git glibc-devel glibc-static libstdc++-static libX11-devel make mesa-libGL-devel ncurses-devel patch zlib-devel ncurses-devel.i686 readline-devel.i686 zlib-devel.i686 libX11-devel.i686 mesa-libGL-devel.i686 glibc-devel.i686 libstdc++.i686 libXrandr.i686 zip perl-Digest-SHA wgetThe project should build correctly using the default compiler shipped with Fedora but if you encounter compilation errors you might need to install GCC 4.6.x:
Download the tarball then install it to /opt, with the following command on Fedora 19/20:
curl -O https://people.mozilla.org/~gsvelto/gcc-4.6.4-fc19.tar.xz
sudo tar -x -a -C /opt -f gcc-4.6.4-fc19.tar.xz
To use GCC 4.6.x as the default host compiler you will have to set it explicitly after having retrieved the B2G sources: read Changing the default host compiler to find out how to do it.
Arch Linux
Run the following command in Terminal:
sudo pacman -S --needed alsa-lib autoconf2.13 bison ccache curl firefox flex gcc-multilib git gperf libnotify libxt libx11 mesa multilib-devel wget wireless_tools yasm zip lib32-mesa lib32-mesa-libgl lib32-ncurses lib32-readline lib32-zlibTo install the lib32-* packages you need to have the multilib repository enabled.
B2G can only be compiled with gcc4.6.4, and because Arch Linux always has bleeding edge software you will need to install gcc46-multilib from AUR. Note that you will have to edit the PKGBUILD and add staticlibs to the options array, or gcc will be unable to compile B2G and give you a cannot find -lgcc error when compiling. You will also need to add the following to your .userconfig file:
export CC=gcc-4.6.4
export CXX=g++-4.6.4
By default, Arch Linux uses Python3. You'll have to force it to use the old python2. You can do that by linking the python2 executable to python but this is discouraged and considered error-prone. This will also break python 3 if it is installed on your system. A better way is to use virtualenv/virtualenvwrapper:
sudo pacman -S python-virtualenvwrapper
source /usr/bin/virtualenvwrapper.sh
mkvirtualenv -p `which python2` firefoxos
workon firefoxos
Android will complain that you need make 3.81 or make 3.82 instead of 4.0. You can download make 3.81 from AUR. This will install the make-3.81 binary on your path, you need to create a symlink named make to a location earlier in the PATH variable for the build to use the correct version.
mkdir -p ~/bin
ln -s `which make-3.81` ~/bin/make
export PATH=~/bin:$PATH
Android also needs the Java6 SDK and Arch only has Java7. Unfortunately the aur build is broken, but you can still download the Java 6 SDK and install it manually. You will then need to put it in your path.
cp ~/Downloads/jdk-6u45-linux-x64.bin /opt
su
cd /opt
chmod +x jdk-6u45-linux-x64.bin
./jdk-6u45-linux-x64.bin
exit
ln -s /opt/jdk1.6.0_45/bin/java ~/bin/java
Gentoo Linux
Installing ccache
You will need to install ccache, a tool for caching partial builds.
# emerge -av ccacheBecause ccache is known to frequently cause support issues, Gentoo encourages you to use it explicitly and sparingly.
To enable the required use of ccache, on the subsequent step of this guide where the ./build.sh script is called, Gentoo users should instead run the command with an explicitly extended path, ie.
PATH=/usr/lib64/ccache/bin:$PATH ./build.shGenerating Partition Images
If you are building B2G for actual physical hardware, then you may at some point also wish to generate some partition images for upload to your device. (For example, to restore backed up files to the device via the fastboot utility)
The filesystem image format used in this case is YAFFS2 (Yet Another Filesystem 2). Gentoo has support for the very latest (ie. git HEAD) yaffs2-utils userland package in portage. (Note: You will also need kernel patches if you want to mount YAFFS2 images, but this is not really required since you can deconstruct and rebuild them instead.)
# emerge --autounmask-write yaffs2-utils; etc-update; emerge -av yaffs2-utilsIn order to generate such an image, simply change to the parent directory of the partition filesystem tree you wish to package, and issue a command like this:
mkyaffs2image system/ system.imgAnforderungen für Mac OS X
Um Firefox OS unter Mac OS X zu bauen, benötigt man etwas Vorarbeit, die unten detailiert beschrieben ist. Außerdem werden typische Irrtümer und Fehler und ihre Lösungen erläutert.
Anmerkung: Das Bauen (und Konfigurieren der Quellen) von B2G für das Gerät Keon funktioniert nicht auf einem Mac OS-Rechner. Stattdessen muß man unter Linux bauen, ggf. auf demselben Rechner, auf dem auch Mac OS läuft.
Passende XCode-Versionen für Mac OS 10.9
XCode 4.2 oder älter sind nicht kompatibel mit OS X 10.9 ("Mavericks") und fallen daher ganz aus. Ansonsten gilt, daß man den ICS-Emulator nicht mit OS X 10.9 oder neuer bauen kann, und für das Gerät "flatfish" scheitert das Bauen mit allen Entwicklungsumgebungen der Versionen XCode 5.x.
| emulator (ICS) | flatfish/vixen (JB-4.2) | emulator-jb (JB-4.3) | emulator-kk (KitKat-4.4) | |
| XCode 4.3.3 | X | X | X | X |
| XCode 4.4.1 | X | O[1] | O | O |
| XCode 4.5.2 | X | O[1] | O | O |
| XCode 4.6.3 | X | O[1] | O | O |
| XCode 5.0.2 | X | X | O | O |
| XCode 5.1.1 | X | X | O | O |
| XCode 6.0.1 | X | X | X | X |
| XCode 6.1beta2 | X | X | X | X |
- You must have environment variable BUILD_MAC_SDK_EXPERIMENTAL=1 exported to build flatfish/vixen.
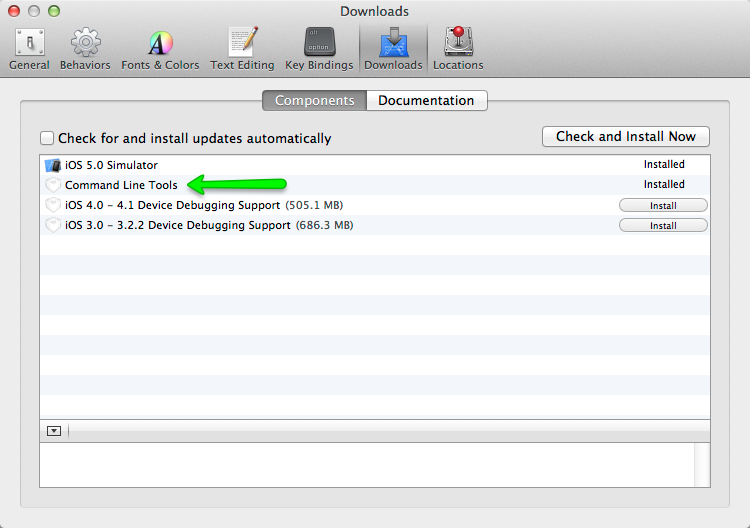
Install XCode Command Line Utilities
You need to install Xcode's Command Line Utilities. You can download just the Command Line Utilities from Apple's developer downloads page for your particular version of OS X, however if you would like the entire Xcode suite of applications, you can install Xcode through the Mac App Store.
Xcode 4.3.1 (OS X 10.7 "Lion") and other newer versions such as 4.4.1+ (that is, Mac OS X10.8 "Mountain Lion"), won't necessarily include the required Command Line Utilities. When you install Xcode, make sure to go into Preferences, then the Downloads panel, and install the Command Line Utilities. In addition, make sure you have at least 20 GB of free disk space.
Run Firefox OS Mac Bootstrap
Next, open a terminal and run the following command:
curl -fsSL https://raw.github.com/mozilla-b2g/B2G/master/scripts/bootstrap-mac.sh | bash
This will pull and run a bootstrap script that makes sure you have all the prerequisites met to build the emulator. It will also prompt you for permission to install anything you're missing, and provide warnings and suggested fixes to problems. The script will check for and install the following items:
gitgpgccacheyasmautoconf-213gcc-4.6homebrew
Xcode wrangling
If you have already upgraded to Xcode 4.4+ and get the message that Xcode is outdated, check the Xcode path with:
xcode-select -print-path
If it still points to /Developer you can update the path with:
sudo xcode-select -switch /Applications/Xcode.app
Making the Mac OS X 10.6 SDK available
You also need to have the Mac OS X 10.6 SDK available. The SDK needs to be available at
/Applications/Xcode.app/Contents/Developer/Platforms/MacOSX.platform/Developer/SDKs/
If it cannot be found there you will need to extract and copy it from Xcode 4.3. To do this:
- Download the XCode 4.3 .dmg file from the Apple Developer portal (you'll need an Apple Developer account).
- Download the utility Pacifist and use it to extract the 10.6 SDK from the XCode 4.3 .dmg file. Click on the "Extract Package" button, find the SDK by searching for 10.6 in the search box, then Ctrl + click on the MacOSX10.6.sdk directory and Extract it to a suitable location.
- Add a symlink from the 10.6 SDK location to the
/Applications/Xcode.app/Contents/Developer/Platforms/MacOSX.platform/Developer/SDKs/directory. For example, if you put the 10.6 SDK on your desktop, the comment would be
ln -s /Users/<yourusername>/Desktop/MacOSX10.6.sdk /Applications/Xcode.app/Contents/Developer/Platforms/MacOSX.platform/Developer/SDKs/
Note: We can drop the 10.6 SDK requirement after bug 784227 has been fixed, and our version of platform_build has been updated.
Be aware of Mac file system case sensitivity
By default, Mac OS X ships with a case-insensitive file system. This is problematic because the Linux kernel has a number of files with the same name, but different case. For example, see the header files xt_CONNMARK.h and xt_connmark.h. This results in a number of files appearing to be modified in /kernel after a fresh ./config.sh.
In many cases you can run the build just fine; for some platforms, however, you may encounter the following error:
ERROR: You have uncommited changes in kernel
You may force overwriting these changes
with |source build/envsetup.sh force|

ERROR: Patching of kernel/ failed.
Please see bug 867259 for more discussion and possible fixes for this problem.
Alternatively, it will always be safest to build on a case sensitive file system. The easiest way to do this is to create a separate, mountable disk image with case-sensitivity enabled. You can do this using Apple's Disk Utility application or from the command line:
hdiutil create -volname 'firefoxos' -type SPARSE -fs 'Case-sensitive Journaled HFS+' -size 40g ~/firefoxos.sparseimage
Mount the drive with:
open ~/firefoxos.sparseimage
Change into the mounted drive with:
cd /Volumes/firefoxos/
You can then check out the code and compile from this location without worrying about case-sensitivity problems.
Mountain Lion homebrew gotcha
clang: error: unable to execute command: Segmentation fault: 11... try reinstalling the dependency manually adding the --use-gcc flag, for example:
brew install mpfr --use-gcc
Follow Samsung Galaxy S2 extra steps
If you plan to build for the Samsung Galaxy S2, you will also need to install heimdall. See Installing heimdall for details. This is not done for you by the bootstrap script!
~/Library/Application Support/.FUS, and leaves a reference to a utility there in your user startup items list. You will want to remove these manually.Fix libmpc dependency if broken
gcc 4.6 was built with libmpc 0.9; if you then use homebrew to update packages, libmpc gets updated to version 1.0, but homebrew doesn't rebuild gcc 4.6 after the library version changes. So you need to create a symlink to make things work again, like this:
cd /usr/local/lib/
ln -s libmpc.3.dylib libmpc.2.dylib
Optional: Install HAX
Intel provides a special driver that lets the B2G emulator run its code natively on your Mac instead of being emulated, when you're using the x86 emulator. If you wish to use this, you can download and install it. It's not required, but it can improve emulation performance and stability.
Before you install HAX you will need to install the Android SDK.
Install adb
The build process needs to pull binary blobs from the Android installation on the phone before building B2G (unless you're building the emulator, of course). For this, you will need adb, the Android Debug Bridge.
You can download and install adb as part of the Android SDK package, for Mac, Linux or Windows - visit the Get the Android SDK page.
Newer Linux distributions have adb already in their repositories. For Ubuntu 12.10 and later, run the following command:
sudo apt-get install android-tools-adb
Or for Fedora 18/19:
sudo yum install android-tools
If your distribution does not have packages for adb available (i.e. Ubuntu 12.04 or Fedora 17), you'll need to install the Android SDK starter package for your platform (you'll want the ADT Bundle, not the SDK Tools Only option). Then run their package manager, $SDK_HOME/tools/android, and use the GUI to install "Android SDK Platform-tools".
Find out where adb is installed (usually in usr/bin, possibly additionally inside adt/platform-tools, depending on how you installed it). Be sure to add this directory to your PATH. This can be done by adding the line
PATH=$SDK_HOME:$PATH
replacing $SDK_HOME with the location of the android sdk, to your ~/.bashrc or equivalent.
Install heimdall
Heimdall is a utility for flashing the Samsung Galaxy S2. It's used by the Boot to Gecko flash utility to replace the contents of the phone with Firefox OS, as well as to flash updated versions of B2G and Gaia onto the device. You'll need it if you want to install Firefox OS on a Galaxy S2; it is not needed for any other device. For other devices, we build and use the fastboot utility instead.
There are two ways to install heimdall:
- You can download the code GitHub and build it yourself.
- Use a package manager to install it.
- On Linux:
sudo apt-get install libusb-1.0-0 libusb-1.0-0-dev - On Mac, you can download an installer package and use that.
- On Linux:
Configure ccache
The B2G build process uses ccache. The default cache size for ccache is 1GB, but the B2G build easily saturates this; around 3GB is recommended. You can configure your cache by running the following command inside terminal:
$ ccache --max-size 3GBFor Linux: configure the udev rule for your phone
Note: This section is specific to Linux; Mac OSX has the necessary device permissions set up already.
Next, you need to confingure the udev rule for your phone,
You can get the USB vendor ID by running lsusb with your phone plugged in, but typically it's Google 18d1, Samsung 04e8, ZTE 19d2, Geeksphone/Qualcomm 05c6. Add this line in your /etc/udev/rules.d/android.rules file (replacing XXXX with the ID for your device):
SUBSYSTEM=="usb", ATTR{idVendor}=="XXXX", MODE="0666", GROUP="plugdev"
Take ZTE for example, the content in android.rules will be
SUBSYSTEM=="usb", ATTR{idVendor}=="19d2", MODE="0666", GROUP="plugdev"
If the file doesn't exist, create it. The rules.d directory is usually read only by default, so you may have to use chmod to make the directory writeable, or the file, or both.
Once you've saved the file, and closed it, make the file readable:
$ sudo chmod a+r /etc/udev/rules.d/android.rules
Now that the udev rules have been updated, restart the udev daemon. For ubuntu:
sudo service udev restart
Finally, unplug and the USB cable but don't replug it in because we need to enable remote debugging on the phone first.
Enable remote debugging
Before you plug your phone back into your USB port, put it USB developer mode. This allows you to debug and flash the phone. To enable developer mode, on your phone select Settings app -> Device information -> More Information -> Developer -> Remote debugging (this was called Developer mode on older versions.) Once the option is checked, remote debugging is enabled, and you are ready to go.
At this point, connect your phone to your computer via a USB cable (if you created the udev rule before, this will trigger udev to detect the phone and create the device node with the right permissions). Now you can check if you can list your device via the adb devices command. If everything has worked ok, you should see an output similar to this (the following is for a Geeksphone Keon):
$ adb devices
List of devices attached
full_keon       device
If the device did not list as expect, check the file name and the script are all correct (see previous section), then restart the computer and retype the command again. Note also that if your device uses fastboot, the bootloader may identify itself with a different vendor ID than the one you see when the device boots normally.
Backup the phone system partition
Note: You have to do this before you build your device if you do not have existing system backup. Because some libraries will be referenced in build time. These library might be proprietary so we can't provide in our code base.
It is recommended to back up the entire Android system partition on your phone.
You can use this copy of the binary blobs for Android in case you later delete your B2G tree. To do this, run:
adb pull /system <backup target dir>/system
Depending on the phone, you may also need to pull the /data and/or /vendor directories:
adb pull /data <backup target dir>/data
adb pull /vendor <backup target dir>/vendor
If the pull commands fail with "insufficient permission" message, try the following:
- stop and restart the adb server, or if that fails,
- double-check that you have granted root permissions to the 'adb' tool within your custom ROM (e.g. under CyanogenMod, change 'Settings -> System -> Developer Options -> Root Access' to 'Apps and ADB' or 'ADB only').
- Verify that you have set up the udev rule correctly (see For Linux: configure the udev rule for your phone.
On to the next step
At this point, you should be ready to fetch the Firefox OS code!