在您開始取得程式碼並建立您的Firefox OS作業系統以前,需要一個設定正確的編譯環境,請參考build system這個頁面,裡面有詳細的說明。這裡簡單的提一下,您可以在64位元的Linux以及OS X上面作編譯。
註: 若您計畫編譯一個Firefox OS並裝載在一隻手機上,請確認該手機在編譯動作開始時"並未"跟您的電腦連接,正確的連結時機會在詳細步驟中說明。
支援的裝置或模擬器
您需要一個目標來裝載您建立的Firefox OS,他可以是一個真實的裝置或是一個模擬器。我們支援數種裝置但一個裝製常常有多種的版本,這樣的情況我們只支援特定的版本。另外不同的裝置我們的支援程度也稍有不同。
註:Mozilla的B2G source code是一個B2G的參考實現,而手機製造商是可以自由的為他們的手機做出patch以及修改的。舉例來說,您在市場上購買的Alcatel One Touch這隻手機裡面的B2G就是一個製造商的版本。這樣B2G版本的差異安裝在上面的應用程式是沒有差異的,不過在平台這一層是有一些差別的。由於Nexus 4的版本是直接由Mozilla維護的,因此跟其他第三級支援裝置比較起來我們各版本的Gecko應該更能直接在Nexus 4上直接無問題的使用。
第一級支援裝置
第一級支援裝置是一些主要開發用的裝置,因此一般來說能得最快的新功能與新的bug fixes。
- Keon
- Keon 即為 Geeksphone Keon 裝置, 也是最初的開發機種中的一個。 請注意這個裝置上的Forefox OS是由 Geeksphone提供.
- Inari
- Inari 是另外一個測試裝置. 在您建立Firefox OS給ZTE Open的裝置時請使用這個configuration (configuration的細節後面會提到)。注意: 較新版本的Firefox版本可能會無法在ZTE Open手機的default boot partition中開機成功。
- Flame
- Flame 是 Mozilla 最新的 Firefox OS 標準參考開發裝置,除了Flame這隻手機以外,在您建立給 ZTE Open C 這個裝置的Firefox OS時請也在configuration 中選用Flame(configuration 的細節後面會提到)。 兩隻手機都用一樣的設定原因是他們都是基於 Android jellybean。
- 模擬器 (ARM 與 x86)
- 有兩種模擬器,一種是模擬ARM code,另外一種直接用x86 code執行所有的功能. 更多相關資訊請參考Learn more about installing and using the emulators.
- 請注意基本上您應該不要使用 x86 模擬器 — 這個模擬器安裝不易而且支援的程度不是很理想。
- 桌面 client 程式
- 您也可以建立一個桌面版本的Firefox OS; 這個版本是讓 Gecko 跑在一個 XULRunner 程式裡面讓您可以使用 Gaia 提供的使用者界面.
- Flatfish
- Flatfist 是第一隻 Firefox OS 平板版本,雖然某些功能像是Web Telephony 沒有辦法使用。在編譯 Flatfish 時,會需要一些額外的設定。
另外雖然可能很顯而易見,還是提一下您在建立 桌面 client 程式 或任意一個 模擬器 時是不需要手機的。
第二級支援裝置
一般來說,Firefox的功能在第二級支援裝置上都是可用的,這一些裝置被許多開發者使用(特別是應用程式開發者),因此並不需要太過即時的得到Firefox OS上新的改變。
- Samsung Nexus S
- 已知的 Nexus S 支援型號為 GT-I9020A 以及 GT-I9023,其他的型號可能可以支援
- Samsung Nexus S 4G
- SPH-D720 這個型號被當作第二級的支援裝置
第三級支援裝置
給這一些裝置的Firefox OS是可以被建立的,不過工程師並不會時常用這一些裝置做開發,因此穩定度與功能上面會明顯的比前兩級的支援裝置要不足。
- Samsung Galaxy S2
- 只有i9100這個型號是被正式支援的。(i9100P 應該也可以支援因為差異只在 NFC 晶片)
- Samsung Galaxy Nexus
- 現在看起來所有的型號都可以支援
- Nexus 4
- 有一些在 IRC 上的使用者測試並成功過。 如果機器本身是 Android 4.4 也許需要降回 4.3 (Android images available from Google)
- Nexus 5
- 一些在 IRC 上的使用者測試並成功過。
- Tara
- Tara 是另一之測試裝置. Tara 的 manifest 只在 master branch. 取得 Tara 的 script 為 "BRANCH=master ./config.sh tara"。
- Unagi
- Unagi 用來當作中低階智慧型手機的測試與開發裝置。很多 Firefox OS的開發者使用 Unagi 作開發。
- Pandaboard
- Pandaboard 是一片基於 OMAP 4 架構的開發板,作為在各種不同行動平台的開發使用。
註: 第二級與第三級支援裝置沒有硬體的 Home 按鈕,不過會有一個軟體的 Home 按鈕
所有第一級支援裝置都有一個硬體的 Home 按鈕,這個按鈕可以讓使用者直接回到 Home screen。現在市面上大多數基於 ICS 的 Android 裝置使用在螢幕上的觸碰按鍵。我們現在提供一個虛擬的 Home 按鈕給這一些缺少硬體按鍵的裝置。若您發現這個虛擬的 Home 按鈕沒出現,請打開 Setting 程式,然後到 Developer settings 並選取 Enable software home button。
在 Firefox OS 1.4 版有另外一個 developer option 叫做 "Home gesture enabled"; 開啟這的選項表示虛擬的 Home 按鈕將消失,取而代之的是一個由螢幕下方向上滑動的手勢。
使用 GNU/Linux 的需求
重要: 即使您沒有要編譯自己的 Boot 2 Gecko,而只有要使用到 Gaia's make system, 您仍需要正確版本的 Python 與 Node.js。
在 Linux 建立 Firefox OS, 您需要:
- 一種 64 bit 的 GNU/Linux distribution (建議Ubuntu 14.04).
- 至少 4 GB 的記憶體.
- 至少 40 GB 的硬碟空間.
這其實比最低需求要高不過常常在建立 Firefox OS 的過程出現問題只是因為資源不太夠。一個常見的例子為 "arm-linux-androideabi-g++: Internal error: Killed (program cc1plus)".
下面列出個工具也必須被安裝:
- autoconf 2.13
- bison
- bzip2
- ccache
- curl
- flex
- gawk
- git
- gcc / g++ / g++-multilib
- java sdk (jdk)
- lzop
- make
- OpenGL shared libraries
- patch
- X11 headers
- 32-bit ncurses
- 32-bit zlib
64 位元安裝需求
這個部份列出了一些在不同的Linux發行版本中你必須執行的指令, 以利於安裝所有的需求來建構 Firefox OS.
Ubuntu 12.04 / Linux Mint 13 / Debian 6
在終端機中執行下列指令:
sudo apt-get update
sudo apt-get install autoconf2.13 bison bzip2 ccache curl flex gawk gcc g++ g++-multilib git ia32-libs lib32ncurses5-dev lib32z1-dev libasound-dev libgconf2-dev libgl1-mesa-dev libx11-dev lzop make zip
如果您將建構 "Flame" reference device 或是 Nexus 5, 請在終端機執行以下指令:
sudo apt-get install libxml2-utils
您可以透過這個ppa來安裝 jdk。
And see the above comments about emulator build issues!
Ubuntu 12.10 / Debian 7
在終端機中執行下列指令:
sudo apt-get install autoconf2.13 bison bzip2 ccache curl flex gawk gcc g++ g++-multilib gcc-4.6 g++-4.6 g++-4.6-multilib git ia32-libs lib32ncurses5-dev lib32z1-dev libgl1-mesa-dev libx11-dev make zip
In addition to the emulator build issues discussed above, the compiler will default to gcc-4.7, which will fail to build with an error along the following lines:
"KeyedVector.h:193:31: error: indexOfKey was not declared in this scope, and no declarations were found by argument-dependent lookup at the point of instantiation"
To fix this, you will need to specify GCC 4.6 as the default host compiler after having retrieved the B2G sources: Read Changing the default host compiler to find out how to do it.
In a fresh Ubuntu 12.10 install, you'll get an error about unmet dependencies for ia32-libs. The following commands fix it:
sudo dpkg --add-architecture i386
sudo apt-get update
sudo apt-get install ia32-libs
Ubuntu 13.04
Run the following command in Terminal:
sudo apt-get install --no-install-recommends autoconf2.13 bison bzip2 ccache curl flex gawk gcc g++ g++-multilib gcc-4.6 g++-4.6 g++-4.6-multilib git ia32-libs lib32ncurses5-dev lib32z1-dev zlib1g:amd64 zlib1g-dev:amd64 zlib1g:i386 zlib1g-dev:i386 libgl1-mesa-dev libx11-dev make zip
In addition to the emulator build issues discussed above, the compiler will default to gcc-4.7, which will fail to build with an error along the following lines:
"KeyedVector.h:193:31: error: indexOfKey was not declared in this scope, and no declarations were found by argument-dependent lookup at the point of instantiation"
To fix this, you will need to specify GCC 4.6 as the default host compiler after having retrieved the B2G sources: Read Changing the default host compiler to find out how to do it.
Ubuntu 13.10
With Ubuntu 13.10, multi-arch packages are now the main way to support multiple architectures (e.g. 32-bit on a 64-bit install). You must tell your Ubuntu system that you want to support 32-bit packages as well:
sudo dpkg --add-architecture i386
sudo apt-get update
Once you've completed that, then you can install the necessary packages:
sudo apt-get install --no-install-recommends autoconf2.13 bison bzip2 ccache curl flex gawk gcc g++ g++-multilib gcc-4.6 g++-4.6 g++-4.6-multilib git lib32ncurses5-dev lib32z1-dev zlib1g:amd64 zlib1g-dev:amd64 zlib1g:i386 zlib1g-dev:i386 libgl1-mesa-dev libx11-dev make zip libxml2-utils

sudo update-alternatives --install /usr/bin/gcc gcc /usr/bin/gcc-4.6 1

sudo update-alternatives --install /usr/bin/gcc gcc /usr/bin/gcc-4.8 2

sudo update-alternatives --install /usr/bin/g++ g++ /usr/bin/g++-4.6 1

sudo update-alternatives --install /usr/bin/g++ g++ /usr/bin/g++-4.8 2

sudo update-alternatives --set gcc "/usr/bin/gcc-4.6"

sudo update-alternatives --set g++ "/usr/bin/g++-4.6"
Ubuntu 14.04
Follow the instructions given for Ubuntu 13.10.
Fedora 17/18/19/20
Run the following command in Terminal:
sudo yum install autoconf213 bison bzip2 ccache curl flex gawk gcc-c++ git glibc-devel glibc-static libstdc++-static libX11-devel make mesa-libGL-devel ncurses-devel patch zlib-devel ncurses-devel.i686 readline-devel.i686 zlib-devel.i686 libX11-devel.i686 mesa-libGL-devel.i686 glibc-devel.i686 libstdc++.i686 libXrandr.i686 zip perl-Digest-SHA wget
In addition to the above you will need GCC 4.6.x in order to compile the project:
Download the right version for your Fedora installation, then install it to /opt, with the following command on Fedora 17/18:
curl -O https://people.mozilla.org/~gsvelto/gcc-4.6.4-fc18.tar.xz
sudo tar -x -a -C /opt -f gcc-4.6.4-fc18.tar.xz
And with the following command for Fedora 19/20:
curl -O https://people.mozilla.org/~gsvelto/gcc-4.6.4-fc19.tar.xz
sudo tar -x -a -C /opt -f gcc-4.6.4-fc19.tar.xz
You will need to specify GCC 4.6.x as the default host compiler after having retrieved the B2G sources: Read Changing the default host compiler to find out how to do it.
If build fails with the compiler complaining about not finding libmpc.so.2, install the package compat-libmpc
Arch Linux
Run the following command in Terminal:
sudo pacman -S --needed alsa-lib autoconf2.13 bison ccache curl firefox flex gcc-multilib git gperf libnotify libxt libx11 mesa multilib-devel wget wireless_tools yasm zip lib32-mesa lib32-mesa-libgl lib32-ncurses lib32-readline lib32-zlib
To install the lib32-* packages you need to have the multilib repository enabled.
B2G can only be compiled with gcc4.6.4, and because Arch Linux always has bleeding edge software you will need to install gcc46-multilib from AUR. Note that you will have to edit the PKGBUILD and add staticlibs to the options array, or gcc will be unable to compile B2G and give you a cannot find -lgcc error when compiling. You will also need to add the following to your .userconfig file:
export CC=gcc-4.6.4
export CXX=g++-4.6.4
By default, Arch Linux uses Python3. You'll have to force it to use the old python2. You can do that by linking the python2 executable to python but this is discouraged and considered error-prone. This will also break python 3 if it is installed on your system. A better way is to use virtualenv/virtualenvwrapper:
sudo pacman -S python-virtualenvwrapper
source /usr/bin/virtualenvwrapper.sh
mkvirtualenv -p `which python2` firefoxos
workon firefoxos
Android will complain that you need make 3.81 or make 3.82 instead of 4.0. You can download make 3.81 from AUR. This will install the make-3.81 binary on your path, you need to create a symlink named make to a location earlier in the PATH variable for the build to use the correct version.
mkdir -p ~/bin
ln -s `which make-3.81` ~/bin/make
export PATH=~/bin:$PATH
Android also needs the Java6 SDK and Arch only has Java7. Unfortunately the aur build is broken, but you can still download the Java 6 SDK and install it manually. You will then need to put it in your path.
cp ~/Downloads/jdk-6u45-linux-x64.bin /opt
su
cd /opt
chmod +x jdk-6u45-linux-x64.bin
./jdk-6u45-linux-x64.bin
exit
ln -s /opt/jdk1.6.0_45/bin/java ~/bin/java
Gentoo Linux
Installing ccache
You will need to install ccache, a tool for caching partial builds.
# emerge -av ccache
Because ccache is known to frequently cause support issues, Gentoo encourages you to use it explicitly and sparingly.
To enable the required use of ccache, on the subsequent step of this guide where the ./build.sh script is called, Gentoo users should instead run the command with an explicitly extended path, ie.
PATH=/usr/lib64/ccache/bin:$PATH ./build.sh
Generating Partition Images
If you are building B2G for actual physical hardware, then you may at some point also wish to generate some partition images for upload to your device. (For example, to restore backed up files to the device via the fastboot utility)
The filesystem image format used in this case is YAFFS2 (Yet Another Filesystem 2). Gentoo has support for the very latest (ie. git HEAD) yaffs2-utils userland package in portage. (Note: You will also need kernel patches if you want to mount YAFFS2 images, but this is not really required since you can deconstruct and rebuild them instead.)
# emerge --autounmask-write yaffs2-utils; etc-update; emerge -av yaffs2-utils
In order to generate such an image, simply change to the parent directory of the partition filesystem tree you wish to package, and issue a command like this:
mkyaffs2image system/ system.img
使用 Mac OS X 的需求
要在Mac OS X 上建構 Firefox OS, 您必須遵循一些步驟, 以下將會詳細說明. 我們也會提出一些您可能在特殊情況下會遇到的錯誤, 以及他們的解決方法.
Note: Configuring and Building B2G for Keon WON'T WORK on a Mac. You'll need to use Linux to build B2G for this device.
版本相容性
XCode 4.2 以下的版本與 Mac OS X 10.9 (a.k.a. "Mavericks") 並不相容, 所以您可能會很驚訝地發現Firefox OS會建構錯誤. 基本上您無法在 Mac OS X 10.9 以上的版本建構 ICS emulator, 並且 flatfish 在XCode 5.x系列會無法建構.
| emulator (ICS) | flatfish (JB-4.2) | emulator-jb (JB-4.3) | emulator-kk (KitKat-4.4) | |
| XCode 4.3.3 | X | X | X | X |
| XCode 4.4.1 | X | O[1] | O | O |
| XCode 4.5.2 | X | O[1] | O | O |
| XCode 4.6.3 | X | O[1] | O | O |
| XCode 5.0.2 | X | X | O | O |
| XCode 5.1.1 | X | X | O | O |
- 您必須將設定環境變數 BUILD_MAC_SDK_EXPERIMENTAL=1 並將其 export 以建構 flatfish.
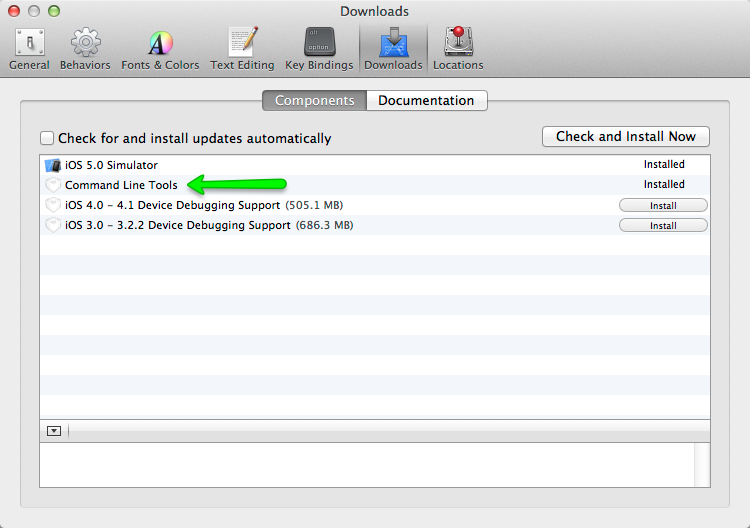
安裝 XCode Command Line Utilities
您必須安裝 Xcode's Command Line Utilities. 您可以只下載 Command Line Utilities, 只需要在 Apple's developer downloads page 挑選您的 OS X 版本, 然而如果您想要完整的 Xcode suite, 你可以在 Mac App Store 安裝他們.
Xcode 4.3.1 (OS X 10.7 "Lion") 以及其他較新的版本如 4.4.1+ (也就是 Mac OS X 10.8 "Mountain Lion"), 並不會自動包含我們所需的 Command Line Utilities. 當您安裝 Xcode 時, 請確認進入 Preferences, then the Downloads panel, and install the Command Line Utilities. 另外, 請確認您至少有 20 GB 的硬碟空間.
Note: The Firefox OS 模擬器 需要 Core 2 Duo processor 或較新的處理器; 也就是, 一個相容於Mac OS X 10.7 "Lion"的作業系統. 您的作業系統不一定要是OS X Lion, 您只需要與其相容. 也就是您當然可以建構Firefox OS 在較舊版本的Mac 上.
Note: XCode 4.2.x or older is not compatible with Mac OS X 10.9 or above, and XCode 4.3.x has no platform SDK for 10.8. Please install a newer version. If you're also working on flatfish, please make sure any of XCode 4.4, 4.5, and 4.6 is available.
Run Firefox OS Mac Bootstrap
Next, open a terminal and run the following command:
curl -fsSL https://raw.github.com/mozilla-b2g/B2G/master/scripts/bootstrap-mac.sh | bash
This will pull and run a bootstrap script that makes sure you have all the prerequisites met to build the emulator. It will also prompt you for permission to install anything you're missing, and provide warnings and suggested fixes to problems. The script will check for and install the following items:
gitgpgccacheyasmautoconf-213gcc-4.6gnu-tarhomebrew
Xcode wrangling
If you have already upgraded to Xcode 4.4+ and get the message that Xcode is outdated, check the Xcode path with:
xcode-select -print-path
If it still points to /Developer you can update the path with:
sudo xcode-select -switch /Applications/Xcode.app
Making the Mac OS X 10.6 SDK available
You also need to have the Mac OS X 10.6 SDK available. The SDK needs to be available at
/Applications/Xcode.app/Contents/Developer/Platforms/MacOSX.platform/Developer/SDKs/
If it cannot be found there you will need to extract and copy it from Xcode 4.3. To do this:
- Download the XCode 4.3 .dmg file from the Apple Developer portal (you'll need an Apple Developer account).
- Download the utility Pacifist and use it to extract the 10.6 SDK from the XCode 4.3 .dmg file. Click on the "Extract Package" button, find the SDK by searching for 10.6 in the search box, then Ctrl + click on the MacOSX10.6.sdk directory and Extract it to a suitable location.
- Add a symlink from the 10.6 SDK location to the
/Applications/Xcode.app/Contents/Developer/Platforms/MacOSX.platform/Developer/SDKs/directory. For example, if you put the 10.6 SDK on your desktop, the comment would be
ln -s /Users/<yourusername>/Desktop/MacOSX10.6.sdk /Applications/Xcode.app/Contents/Developer/Platforms/MacOSX.platform/Developer/SDKs/
Note: This is not necessary for Mac OS X 10.9 or above, because 10.6 SDK is for ICS and ICS doesn't supports Mac OS X 10.9.
Be aware of Mac file system case sensitivity
By default, Mac OS X ships with a case-insensitive file system. This is problematic because the Linux kernel has a number of files with the same name, but different case. For example, see the header files xt_CONNMARK.h and xt_connmark.h. This results in a number of files appearing to be modified in /kernel after a fresh ./config.sh.
In many cases you can run the build just fine; for some platforms, however, you may encounter the following error:
ERROR: You have uncommited changes in kernel
You may force overwriting these changes
with |source build/envsetup.sh force|

ERROR: Patching of kernel/ failed.
Please see bug 867259 for more discussion and possible fixes for this problem.
Alternatively, it will always be safest to build on a case sensitive file system. The easiest way to do this is to create a separate, mountable disk image with case-sensitivity enabled. You can do this using Apple's Disk Utility application or from the command line:
hdiutil create -volname 'firefoxos' -type SPARSE -fs 'Case-sensitive Journaled HFS+' -size 40g ~/firefoxos.sparseimage
Mount the drive with:
open ~/firefoxos.sparseimage
Change into the mounted drive with:
cd /Volumes/firefoxos/
You can then check out the code and compile from this location without worrying about case-sensitivity problems.
Mountain Lion homebrew gotcha
clang: error: unable to execute command: Segmentation fault: 11... try reinstalling the dependency manually adding the
--use-gcc flag, for example:
brew install mpfr --use-gcc
Follow Samsung Galaxy S2 extra steps
If you plan to build for the Samsung Galaxy S2, you will also need to install heimdall. See Installing heimdall for details. This is not done for you by the bootstrap script!
~/Library/Application Support/.FUS, and leaves a reference to a utility there in your user startup items list. You will want to remove these manually.Fix libmpc dependency if broken
gcc 4.6 was built with libmpc 0.9; if you then use homebrew to update packages, libmpc gets updated to version 1.0, but homebrew doesn't rebuild gcc 4.6 after the library version changes. So you need to create a symlink to make things work again, like this:
cd /usr/local/lib/
ln -s libmpc.3.dylib libmpc.2.dylib
Optional: Install HAX
Intel provides a special driver that lets the B2G emulator run its code natively on your Mac instead of being emulated, when you're using the x86 emulator. If you wish to use this, you can download and install it. It's not required, but it can improve emulation performance and stability.
Before you install HAX you will need to install the Android SDK.
Install adb
The build process needs to pull binary blobs from the Android installation on the phone before building B2G (unless you're building the emulator, of course). For this, you will need adb, the Android Debug Bridge. Our Installing ADB article explains how to get adb installed.
Note for future when you start to use adb: adb needs the phone's lock screen to be unlocked in order to see your phone (at least in later versions of Firefox OS). You'll probably want to disable the lock screen (we'll get to how later in the build instructions).
Install heimdall
Heimdall is a utility for flashing the Samsung Galaxy S2. It's used by the Boot to Gecko flash utility to replace the contents of the phone with Firefox OS, as well as to flash updated versions of B2G and Gaia onto the device. You'll need it if you want to install Firefox OS on a Galaxy S2; it is not needed for any other device. For other devices, we build and use the fastboot utility instead.
There are two ways to install heimdall:
- You can download the code GitHub and build it yourself.
- Use a package manager to install it.
- On Linux:
sudo apt-get install libusb-1.0-0 libusb-1.0-0-dev - On Mac, you can download an installer package and use that.
- On Linux:
Configure ccache
The B2G build process uses ccache. The default cache size for ccache is 1GB, but the B2G build easily saturates this; around 3GB is recommended. You can configure your cache by running the following command inside terminal:
$ ccache --max-size 3GBFor Linux: configure the udev rule for your phone
Note: This section is specific to Linux; Mac OS X has the necessary device permissions set up already.
Next, you need to confingure the udev rule for your phone,
You can get the USB vendor ID by running lsusb with your phone plugged in, but typically it's Google 18d1, Samsung 04e8, ZTE 19d2, Geeksphone/Qualcomm 05c6. Add this line in your /etc/udev/rules.d/android.rules file (replacing XXXX with the ID for your device):
相容的
SUBSYSTEM=="usb", ATTR{idVendor}=="XXXX", MODE="0666", GROUP="plugdev"
Take ZTE for example, the content in android.rules will be
SUBSYSTEM=="usb", ATTR{idVendor}=="19d2", MODE="0666", GROUP="plugdev"
If the file doesn't exist, create it. The rules.d directory is usually read only by default, so you may have to use chmod to make the directory writeable, or the file, or both.
Once you've saved the file, and closed it, make the file readable:
sudo chmod a+r /etc/udev/rules.d/android.rules
Now that the udev rules have been updated, restart the udev daemon.
Ubuntu
sudo service udev restart
Fedora 20
sudo systemctl restart systemd-udevd.service
Finally, unplug and the USB cable but don't replug it in because we need to enable remote debugging on the phone first.
Enable remote debugging
Before you plug your phone back into your USB port, put it USB developer mode. This allows you to debug and flash the phone. To enable developer mode, on your phone enable Remote Debugging in Developer settings (this was called Developer mode on older versions.) Once the option is checked, remote debugging is enabled, and you are ready to go.
At this point, connect your phone to your computer via a USB cable (if you created the udev rule before, this will trigger udev to detect the phone and create the device node with the right permissions). Now you can check if you can list your device via the adb devices command (remember that adb can only see your phone when the lock screen is unlocked). If everything has worked ok, you should see an output similar to this (the following is for a Geeksphone Keon):
$ adb devices
List of devices attached
full_keon       device
If the device did not list as expect, check the file name and the script are all correct (see previous section), then restart the computer and retype the command again. Note also that if your device uses fastboot, the bootloader may identify itself with a different vendor ID than the one you see when the device boots normally.
Backup the phone system partition
Note: You have to do this before you build your device if you do not have an existing system backup, because some libraries will be referenced in build time. These library might be proprietary so we can't provide in our code base.
It is recommended that you back up the entire Android system partition on your phone.
You can use this copy of the binary blobs for Android in case you later delete your B2G tree. To do this, run:
adb pull /system <backup target dir>/system
Depending on the phone, you may also need to pull the /data and/or /vendor directories:
adb pull /data <backup target dir>/data
adb pull /vendor <backup target dir>/vendor
If the pull commands fail with an "insufficient permission" message, try the following:
- stop and restart the adb server, or if that fails,
- double-check that you have granted root permissions to the
adbtool within your custom ROM (e.g. under CyanogenMod, change Settings > System > Developer Options > Root Access to Apps and ADB or ADB only). - Verify that you have set up the udev rule correctly (see For Linux: configure the udev rule for your phone.
On to the next step
At this point, you should be ready to fetch the Firefox OS code!