Introduction
Note: Support for remote XUL has long been a potential security concern; support for it was disabled in Gecko 2.0. This also means you can't load XUL using file:// URLs unless you set the preference dom.allow_XUL_XBL_for_file to true. However, there is a whitelist that lets you specify sites that can still use remote XUL. The Remote XUL Manager extension lets you manage this whitelist, which is maintained using nsIPermissionManager, by creating entries of type "allowXULXBL", like this:
Components.classes["@mozilla.org/permissionmanager;1"]
                    .getService(Components.interfaces.nsIPermissionManager)
                    .add(uri, 'allowXULXBL', Components.interfaces.nsIPermissionManager.ALLOW_ACTION);
XUL (pronounced like "zool"), which is short for XML-based User Interface Language, is an XML-based language for describing application interfaces. It contains elements for all common UI widgets (menus, buttons, toolbars, etc.) and many sophisticated ones (trees, browsers, color pickers).
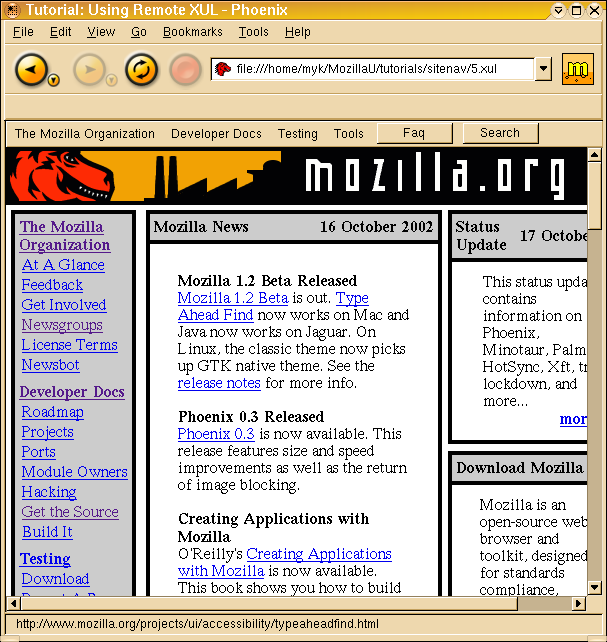
XUL is often used by desktop applications like Mozilla but can also be loaded from a web server and rendered inside the content pane of a compatible browser. XUL loaded and rendered in this way is called remote XUL and can be used for basic functions like web site navigation as well as to build sophisticated web-based applications. [***aw: we should have a screenshot here of a xul document loaded in a content window***]
This tutorial walks you through the process of building XUL-based navigation for the mozilla.org web site. After completing the tutorial you should understand how to:
- create XUL documents;
- serve them from a web server;
- use Cascading Style Sheets (CSS) to change their appearance;
- use JavaScript to define their behavior.
Global Web Site Navigation
Most web sites today have poor global navigation (features for locating and visiting pages across the entire site). It is difficult to discern the site's basic structure and available resources, which makes it hard to locate a particular page or find the one with the information you want.
Part of the problem is that HTML has limited features for navigation. Its primary mechanism--the hyperlink--was designed to be interspersed in content. HTML-based navigation bars take up too much space, DHTML menus are slow and buggy, and site maps make you go to an intermediate page to find the information you want.
XUL's navigation-oriented widgets, like toolbars, menus, and trees, are a better way to provide web site navigation because they can fit a lot of navigation into a small space, render quickly, and work well.
Note: The downside to using XUL is that it only works with browsers that understand it. This isn't a problem inside an organization that uses Mozilla-based browsers exclusively, but for other sites you may need to provide another form of navigation as well.
Prerequisites
To understand this tutorial you should have experience with tag-based languages like HTML along with basic JavaScript, CSS, and the DOM. Knowledge of XML and its syntax is useful but not required. You also need a text editor and a web browser that can render XUL, like Mozilla, or Firefox.
If you build a XUL file along with this tutorial and put it onto a web server, you need to configure your web server to specify the content type of XUL files as application/vnd.mozilla.xul+xml. For Apache, you can do this by adding the following line to your mime.types file:
application/vnd.mozilla.xul+xml .xul
Alternately, add this line to your httpd.conf file or, if the Apache server is configured to allow it, to the .htaccess file in the directory from which the XUL file is served:
AddType application/vnd.mozilla.xul+xml .xul
Then restart your web server. With PHP you can send the mime-type with the header() function.
<?php
header('Content-type: application/vnd.mozilla.xul+xml');
?>
<!-- XUL markup starts here -->
Note that you don't need a web server for this tutorial; you can load the document you create on your computer via a "file" URL or the "Open File" function of your browser.
Step 1: a basic XUL document
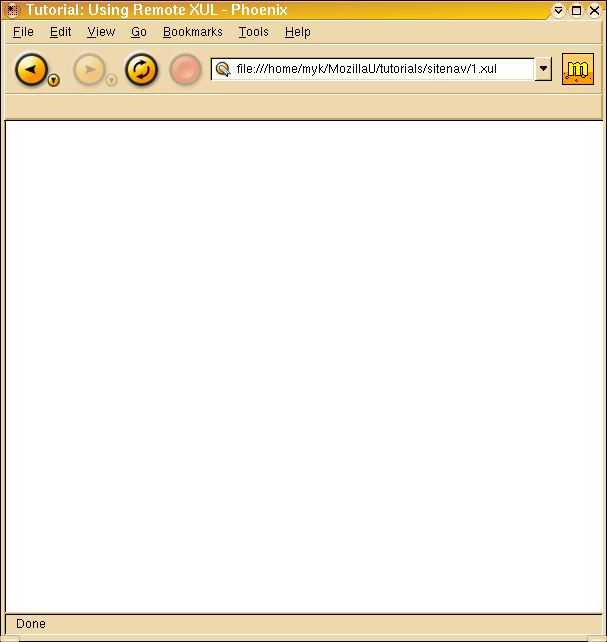
The first thing we need to do is create a basic XUL document.
<?xml version="1.0"?>

<window xmlns="https://www.mozilla.org/keymaster/gat...re.is.only.xul" />
A XUL document requires only two entities to be valid, an XML processing instruction on the first line that identifies the file as XML, and a window element that defines a XUL application window (or in this case web page).
The processing instruction is required because XUL is an XML-based language, and this instruction tells browsers how to parse the document. The window element is the root (outermost) element in a XUL document and encompasses all other elements. It is analogous to the <html> element in HTML.
These two elements give us a valid XUL document we can load and display in our web browser, even though there's nothing to see yet.
Step 2: an iframe for displaying the web site content
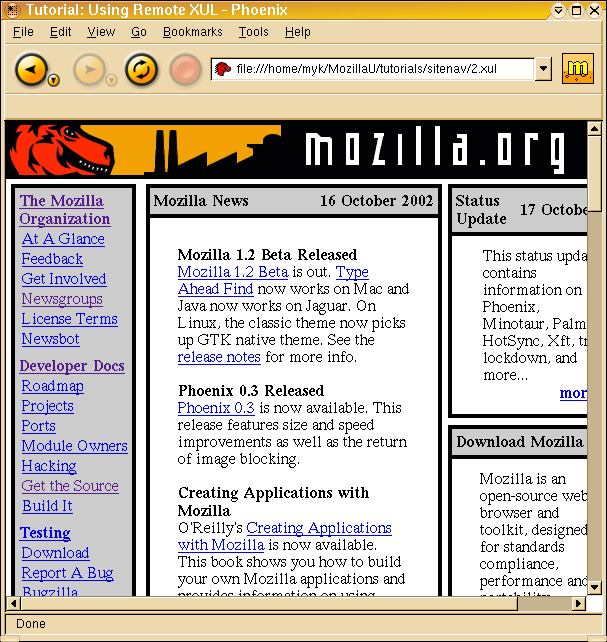
Now that we have a basic XUL document, we need a way to display pages from the mozilla.org web site. For that we'll use a XUL iframe element.
<?xml version="1.0"?>

<window xmlns="https://www.mozilla.org/keymaster/gat...re.is.only.xul">

  <iframe src="https://www.mozilla.org/" flex="1" />

</window>
The XUL iframe element is just like its HTML counterpart: it defines an area within which web content can be displayed. Its src attribute contains the URL of the page being displayed in the iframe. We set this value to the mozilla.org home page by default so that page loads into the iframe when we first load the XUL document.
The iframe's flex attribute tells the browser to stretch the iframe to fill the space available to it. Without it, the iframe's size would be a fixed default and wouldn't change when the user resized their window. [optionally show what this looks like]
The value of the flex attribute determines the extent to which the element will stretch relative to other flexible elements. An element with a flex of "2" is twice as flexible as an element with a flex of "1", so the first element might show up as twice as wide as the second. In our case, the iframe will be the only flexible element in our document, so we don't have to worry about its value and give it a standard value of 1. [optionally add something about how "flex" only applies to one axis]
Note that for remote XUL documents you can see changes you make to the UI by reloading the document with your browser's "Reload" function, just as with a typical HTML page.
Step 3: menus and buttons
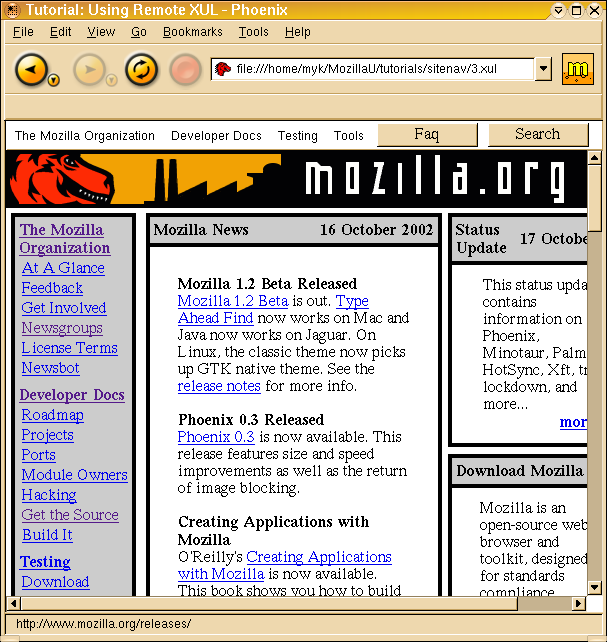
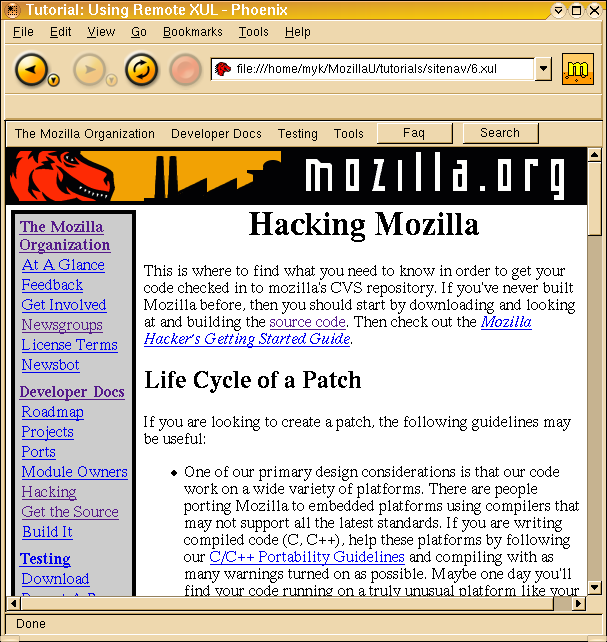
The mozilla.org web site uses an HTML navigation bar on the left-hand side of its pages to provide site navigation. The bar consists of a set of links organized into four main categories: The Mozilla Organization, Developer Docs, Testing, and Tools. The bar also contains two links that are independent of any category: FAQ and Search.
The categorized links are analogous to menu items organized into menus, where clicking the link/selecting the menu item performs some function, so we'll use XUL menu elements to implement them in our document. The independent links, on the other hand, are similar to XUL buttons, which perform a function when pressed, so we'll use the button element for those.
<?xml version="1.0"?>

<window xmlns="https://www.mozilla.org/keymaster/gat...re.is.only.xul">

  <menubar>
    <menu label="The Mozilla Organization" />
    <menu label="Developer Docs" />
    <menu label="Testing" />
    <menu label="Tools" />
    <button label="Faq" />
    <button label="Search" />
  </menubar>

  <iframe src="https://www.mozilla.org/" flex="1" />

</window>
The menubar element is a container for a series of menus. It can also contain other elements. It serves to group menus together into a single horizontal bar like the one you see at the top of many desktop applications. The menu element defines a pull-down menu, and the button element defines a pressable button. Both menus and buttons take a label attribute whose value is the text to display in the element.
Step 4: menu items
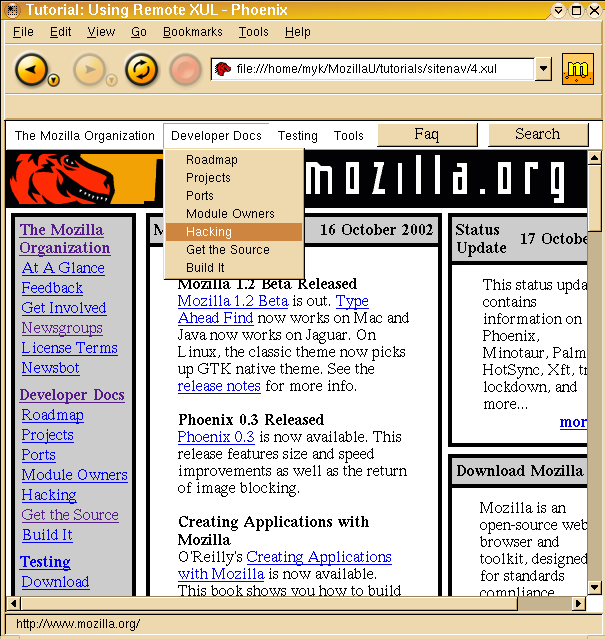
Menus aren't terribly useful unless they contain selectable items. To add items to a menu, we need to first add a menupopup element and then put menuitem elements within it for each item we want to appear on the menu.
<?xml version="1.0"?> <window xmlns="https://www.mozilla.org/keymaster/gat...re.is.only.xul"> <menubar> <menu label="The Mozilla Organization"> <menupopup> <menuitem label="At a Glance" value="https://www.mozilla.org/mozorg.html" /> <menuitem label="Feedback" value="https://www.mozilla.org/feedback.html" /> <menuitem label="Get Involved" value="https://www.mozilla.org/get-involved.html" /> <menuitem label="Newsgroups" value="https://www.mozilla.org/community.html" /> <menuitem label="License Terms" value="https://www.mozilla.org/MPL/" /> <menuitem label="Newsbot" value="https://www.mozilla.org/newsbot/" /> </menupopup> </menu> <menu label="Developer Docs"> <menupopup> <menuitem label="Roadmap" value="https://www.mozilla.org/roadmap.html" /> <menuitem label="Projects" value="https://www.mozilla.org/projects/" /> <menuitem label="Ports" value="https://www.mozilla.org/ports/" /> <menuitem label="Module Owners" value="https://www.mozilla.org/owners.html" /> <menuitem label="Hacking" value="https://www.mozilla.org/hacking/" /> <menuitem label="Get the Source" value="https://www.mozilla.org/source.html" /> <menuitem label="Build It" value="https://www.mozilla.org/build/" /> </menupopup> </menu> <menu label="Testing"> <menupopup> <menuitem label="Download" value="https://www.mozilla.org/releases/" /> <menuitem label="Report a Bug" value="https://bugzilla.mozilla.org/enter_bu...?format=guided" /> <menuitem label="Bugzilla" value="https://www.mozilla.org/bugs/" /> <menuitem label="Bug Writing" value="https://www.mozilla.org/quality/bug-w...uidelines.html" /> </menupopup> </menu> <menu label="Tools"> <menupopup> <menuitem label="View Source" value="https://lxr.mozilla.org/seamonkey/" /> <menuitem label="Tree Status" value="https://tinderbox.mozilla.org/showbui...tree=SeaMonkey" /> <menuitem label="New Checkins" value="https://bonsai.mozilla.org/cvsquery.c...id=default&..." /> <menuitem label="Submit a Bug" value="https://bugzilla.mozilla.org/" /> </menupopup> </menu> <button label="Faq" value="https://www.mozilla.org/faq.html" /> <button label="Search" value="https://www.mozilla.org/search.html" /> </menubar> <iframe src="https://www.mozilla.org/" flex="1" /> </window>
The menupopup element is a container for menu items. It represents the rectangular box that appears when you click a menu title. The menuitem element represents a selectable item within the popup. Its label attribute contains the text to display in the item. Its value attribute, while defined in the XUL specification, has no specific function in XUL; it can store any data associated with the item. In our case we use it to store the URL of the page to load when the user selects the item from the menu.
Step 5: appearance
There's an obvious problem with the menus: their labels look plain. This makes them ugly and not like menus at all. In order to give them style we have to reference a stylesheet with rules for styling menus. We could write one ourselves, but we'll make our lives easier and use one of the stylesheets that comes with Mozilla-based browsers. In this case, we'll reference the default application stylesheet--the one used by the browser to style its own interface.
<?xml version="1.0"?>

<?xml-stylesheet href="chrome://global/skin/" type="text/css"?>

<window xmlns="https://www.mozilla.org/keymaster/gat...re.is.only.xul">

  ...

</window>
The xml-stylesheet processing instruction references a stylesheet, applying its rules to the widgets in the XUL document into which it is placed. It is similar to the link ref="stylesheet" element in HTML. The URL we use, chrome://global/skin/, is a reference to the default application stylesheet (a.k.a. skin). If we were to switch the browser to a different skin, the style of our menus would also change. If we want our site to have the same look no matter what skin the user is using, we would need to write our own stylesheet to style the elements.
In case you're wondering, the reason the buttons and menu items had style before we added the stylesheet reference is that some XUL elements are defined in Mozilla using another XML-based language called XBL which provides building blocks for creating UI widgets. XBL files sometimes contain references to the default application stylesheet, and when they do their widgets inherit that style even if we don't specify a stylesheet. You can't count on this behavior, however, so you should always specify a stylesheet.
Step 6: behavior
So far, so good. We have a menu bar with menus and buttons, and we can press the buttons, open the menus, and select their items. The interface is in place, but it doesn't do anything. We want it to load URLs in the iframe when we press the buttons or select the menu items. For that we need to add JavaScript code.
<?xml version="1.0"?>

<?xml-stylesheet href="chrome://global/skin/" type="text/css"?>

<window xmlns="https://www.mozilla.org/keymaster/gat...re.is.only.xul">

  <script type="application/javascript">
    function loadURL(event) {
      var contentFrame = document.getElementById('contentFrame');
      var url = event.target.getAttribute('value');

      if (url) contentFrame.setAttribute('src', url);
    }
  </script>

  ...

</window>
The code to load the URLs is simple. First we write an event handler function that receives an event, extracts a URL from the value attribute of the element where the event occurred (a.k.a. the target element), and loads the URL in the iframe. We add an id attribute to the iframe element so we can reference it from our function, and we add an oncommand event listener to the menubar element that calls the function every time the user clicks a button or selects a menu item.
The oncommand event listener is a generic listener that fires whenever the user manipulates an element in some conclusive way. Because we added it to the menubar item, and events "bubble up" from child element to parent element, it'll fire any time the user manipulates an element inside the menu bar, so we don't have to add it to each menu item and button.
Conclusion
It works! Basic global web site navigation. What we've built is just a start, however. There are many more enhancements we could add, including:
- hierarchical menus for more comprehensive navigation; (Since additional menus and menu items don't take up any more space on the page, we could add links to many more parts of the site without harming usability.)
- embedding the menu bar into the pages; (we can use XBL to embed XUL into HTML pages to get around the limitations of iframes.)
- integrating the search function into the menu bar so you don't have to go to a separate page to use it;
- hiding the HTML-based navigation for users who can see the XUL-based navigation;
- storing the menu structure and items in a remote RDF datasource to make them easier to update and reuse.
Original Document Information
- Last Updated Date: December 7, 2002